How To Format Hard Drive For Mac Os X Install
Using an external drive to install Mac OS X Mountain Lion can save some time if you have to install the operating system on multiple computers. You'll need to purchase a license for each computer you are using, but you can use the same installation software on each computer. This prevents the need to download Mac OS X Mountain Lion from the Apple servers each time you want to install the software. You can also use an external drive to do a fresh installation of Mountain Lion on a hard drive that doesn't have the Mac OS X Recovery partition installed.
Downloading the Installation Files
If your computer still has an operating system installed, then you can download the Mac OS X Mountain Lion software from the Apple Store to your computer. Once the software has completed downloading, force-quit the installer and then locate the Install Mac OS X Mountain Lion application package in the Applications folder. Right-click on the application and select 'Show Package Contents.' Look for a file called InstallESD.dmg by opening the Contents folder and then looking in the Shared Support folder. Copy the file to your Desktop for later use.
Select your external hard drive in the options to the left of the disk utility window. Click on the erase tab and select the Mac OS Extended option. Enter a name into the appropriate field and then click the erase button. Your external hard drive will now work with Mac OS X.
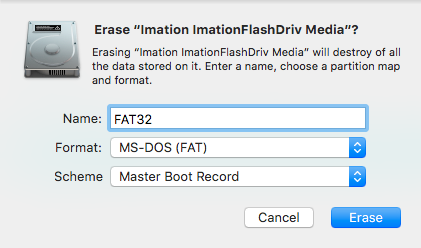
Preparing the External Drive
Connect your external drive to your computer. Open Disk Utility by opening your Applications folder and clicking on the Disk Utility app within the Utilities folder. Select the external drive and then click the 'Erase' tab and select 'Mac OS Extended (Journaled)' for the format. Once you've set all the options, click the 'Erase' button. After you have erased the external drive, drag the InstallESD.dmg file to the Disk Utility sidebar. Click on the disk image to highlight it and then select the 'Restore' tab. Drag the external disk's icon to the Destination field, then click the 'Restore' button.
Booting From the External Drive
Start your computer with the external drive connected to your computer. Hold down the 'Option' key while your Mac boots. Holding down the Option key provides you with a list of bootable drives. Select the external drive you used to create the install image and then wait for your Mac to boot to the hard disk. The installer boots much more quickly than the built-in Internet Recovery options on Mac OS X and allows you to use your installer on any of your Mac computers.
Installing Mac OS X Mountain Lion
After booting to your external disk, you can follow the prompts to verify your Mac OS X installation and begin setting up your operating system. You'll be asked to enter the Apple ID credentials that you used to purchase Mac OS X Mountain Lion. Once verified, select the hard disk on the computer to which you want to install Mac OS X and then follow the prompts to continue with a standard installation. When you purchased Mac OS X Mountain Lion, you were provided with a license to install the software on any Mac computer you own. Only purchase a new license if you are installing Mac OS X on a friend's computer or a computer you do not own.
More Articles
The only remedy is to get a working optical drive so you can install OS X. The one in the computer has apparently gone south.
Clean Install of Snow Leopard
1. Boot the computer using the Snow Leopard Installer Disc or the Disc 1 that came
with your computer. Insert the disc into the optical drive and restart the computer.
After the chime press and hold down the 'C' key. Release the key when you see
a small spinning gear appear below the dark gray Apple logo.
2. After the installer loads select your language and click on the Continue
button. When the menu bar appears select Disk Utility from the Utilities menu.
After DU loads select the hard drive entry from the left side list (mfgr.'s ID and drive
size.) Click on the Partition tab in the DU main window. Set the number of
partitions to one (1) from the Partitions drop down menu, click on Options button
and select GUID, click on OK, then set the format type to MacOS Extended
(Journaled, if supported), then click on the Apply button.
3. When the formatting has completed quit DU and return to the installer. Proceed
with the OS X installation and follow the directions included with the installer.
4. When the installation has completed your computer will Restart into the Setup
Assistant. Be sure you configure your initial admin account with the exact same
username and password that you used on your old drive. After you finish Setup
Assistant will complete the installation after which you will be running a fresh
install of OS X. You can now begin the update process by opening Software
Update and installing all recommended updates to bring your installation current.

Maxbulk mailer mac torrent. Download and install Mac OS X 10.6.8 Update Combo v1.1.
Aug 9, 2014 10:40 PM